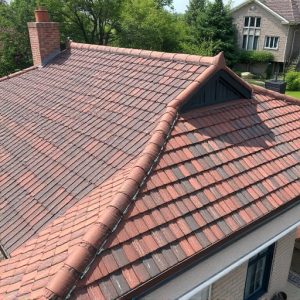
Comprehensive Roofing Guide: Installing Asphalt Shingles for Durability and Efficiency
Asphalt shingle roofs require regular maintenance to ensure their longevity and performance. Homeow…….

Asphalt shingle roofs require regular maintenance to ensure their longevity and performance. Homeowners should perform biannual inspections to catch any damage or wear from severe weather, clear gutters to prevent water damage, and apply protective coatings to shield against UV rays and pollutants. Maintaining proper attic ventilation is also crucial for regulating temperature and moisture, which can significantly affect the roof's health. Regular cleaning, thorough inspections, and swift repairs with high-quality materials are key practices to extend the life of your asphalt shingle roof and keep it in top condition.
(Word count: 253)
roofing, asphalt shingles, installation guide, roof preparation, tools and safety, troubleshooting, maintenance, prolong life
Embark on a comprehensive journey through the process of installing asphalt shingles with our detailed guide. Whether you’re a homeowner aiming to tackle this project yourself or a professional seeking a refresher, this article covers everything from the material composition and types of asphalt shingles to the essential tools and safety gear required for a successful installation. We delve into the preparatory steps necessary to ensure your roof is ready for new shingles, followed by a step-by-step breakdown tailored for sloped roofs. Along the way, we address common issues that may arise and provide valuable tips on maintaining and prolonging the life of your asphalt shingle roof, ensuring it stands up to the elements for years to come. With this guide at your disposal, you’re set to achieve a secure and visually appealing asphalt shingle installation.
- Understanding Asphalt Shingles: Material Composition and Types
- Preparing Your Roof for Asphalt Shingle Installation
- Step-by-Step Guide to Installing Asphalt Shingles on a Sloped Roof
- Essential Tools and Safety Gear for Asphalt Shingle Installation
- Troubleshooting Common Issues During Asphalt Shingle Installation
- Maintaining and Prolonging the Life of Your Asphalt Shingle Roof
Understanding Asphalt Shingles: Material Composition and Types

When it comes to roofing, asphalt shingles are a popular choice due to their durability and versatility. These shingles are composed primarily of fiberglass or organic materials saturated with asphalt for waterproofing. The top layer is made up of embedded mineral granules which protect the shingle from UV rays, ensuring longevity and resistance to environmental wear. There are several types of asphalt shingles available, each designed to cater to different needs and climates. Three-tab shingles offer a classic look with simple, flat designs; dimensional or architectural shingles provide a more upscale appearance with laminated layers for added thickness and visual depth; and premium designer shingles mimic the texture and aesthetic of natural slate or wood shake with advanced manufacturing techniques. Each type offers varying levels of durability and wind resistance, which is crucial for withstanding harsh weather conditions. Homeowners looking to install asphalt shingles should consider these options carefully in relation to their local climate, budget, and the style of their home. Proper installation by skilled professionals ensures that your roof will protect your home effectively, maintaining its integrity against the elements for years to come. It’s also important to select a reputable manufacturer, as the quality of materials can significantly affect the performance and longevity of your roofing system. Understanding these aspects of asphalt shingles is key in making an informed decision that will contribute to the overall safety and aesthetic appeal of your property.
Preparing Your Roof for Asphalt Shingle Installation

When embarking on the installation of asphalt shingles, meticulous roof preparation is paramount to ensure a durable and weather-resistant finish. Begin by conducting a thorough inspection of your existing roofing system. Remove any debris, damaged shingles, or moss accumulation that could impede adhesion or compromise the integrity of the new shingles. Clean the surface thoroughly, ensuring no remnants of previous materials or foreign substances remain. Assess the condition of the underlayment; if it’s worn or damaged, replace it with high-quality felt or synthetic underlayments designed for asphalt shingle applications. Proper ventilation is crucial to prolong the lifespan of your roof and improve energy efficiency. Verify that ridge vents, soffit vents, or other passive ventilation systems are in place and functioning correctly. These steps will provide a solid foundation for your new asphalt shingles, contributing to their longevity and performance. In preparation for the actual shingle installation, measure and cut any necessary materials, such as flashing pieces for valleys, chimneys, and vents. Ensure that all tools and materials are ready and that the installation team is briefed on the specific details of the project. With a well-prepared roof and a clear plan in place, your asphalt shingle installation can proceed smoothly, setting the stage for a robust and aesthetically pleasing result.
Step-by-Step Guide to Installing Asphalt Shingles on a Sloped Roof

When it comes to installing asphalt shingles on a sloped roof, meticulous preparation and adherence to proper technique are key to achieving a durable and weather-resistant finish. The process begins with a thorough inspection of the existing roof structure to ensure it’s in good condition and capable of supporting new shingles. Old shingles, if present, should be removed carefully to prevent damage to the underlying layers. Roofers then examine the decking for any rot or significant damage that might compromise the integrity of the new installation.
With the decking inspected and prepared, the next step involves laying out starter shingles along the bottom edge of the roof. These shingles provide a foundation for the hip and ridge shingles that will cap the peak of the roof later in the process. Following the starter course, roofers proceed to install the first row of asphalt shingles, starting from the bottom and working their way up, overlapping each successive shingle by about half an inch over the one below it. This overlap ensures proper water runoff and protection against the elements. As each row is laid, roofing nails are driven through the slots in the shingles at a 45-degree angle, securing them to the decking beneath. It’s crucial to maintain a uniform and consistent pattern, aligning the shingle tabs over the nails from the course below to hide fasteners and create a clean, finished appearance. Throughout the installation, roofing felt or underlayment may be applied over the shingles for additional protection against moisture, particularly in valleys or around chimneys and vent pipes. Proper attic ventilation is also a consideration to ensure the longevity of the shingles and to maintain the temperature within the home. The final touches involve installing hip and ridge shingles at the peak of the roof, which provide a neat finish and enhance the aesthetic appeal of the property.
Essential Tools and Safety Gear for Asphalt Shingle Installation

Roofing asphalt shingle installation is a task that requires careful planning, the right tools, and appropriate safety gear to ensure both the longevity of the roof and the well-being of those working on it. Essential tools for this project include a chalk line, hammer tackers or nail guns, pry bars, utility knives, saws for cutting shingles, a roofing shovel or rake, and a ladder safety system. A chalk line is used to snap lines that help align the first course of shingles. Hammer tackers or nail guns are invaluable for securing shingles without causing damage with repeated hammer swings. Pry bars aid in removing old shingles, while utility knives and saws are necessary for cutting shingles to fit around vents, chimneys, and other protrusions. A roofing shovel or rake is crucial for clearing debris from the roof surface.
Safety gear is equally important when installing asphalt shingles. A hard hat should be worn at all times to protect against head injuries from falling objects or contact with protruding nails. Safety harnesses and lanyards attached to secure anchor points are essential when working on steep or slippery surfaces to prevent falls. Protective gloves will shield hands from sharp edges and rough materials. Safety glasses should be worn to guard against eye injury from falling debris, loose nails, or when cutting shingles with a utility knife. Lastly, weather-appropriate clothing and non-slip footwear are necessary to ensure comfort and safety under various conditions. With the right tools and safety measures in place, roofers can perform asphalt shingle installation effectively and safely.
Troubleshooting Common Issues During Asphalt Shingle Installation

During asphalt shingle installation, homeowners and roofing professionals may encounter various issues that can affect the longevity and performance of the roof. Common challenges include improper shingle placement, compromised sealant integrity, and suboptimal fastening techniques. To address these problems effectively, it’s crucial to understand their root causes. For instance, if shingles are not lying flat or appear buckled, it may indicate incorrect ventilation or poor substrate preparation. This can lead to moisture ingress and ultimately compromise the structural integrity of the roof. Regularly inspecting the sealant between shingles is another vital aspect; cracks or deterioration here can allow water intrusion. Additionally, using improper nailing techniques—such as nailing too shallow or too deep—can weaken the shingles and cause them to blister or lift over time. To mitigate these issues, ensure that the installation follows manufacturer guidelines, which include maintaining adequate ventilation, applying sealant correctly, and adhering to recommended nailing patterns. Proper maintenance and addressing minor issues promptly can extend the lifespan of your asphalt shingle roof and prevent more costly repairs in the future. Roofing professionals should be well-versed in identifying these common problems and employ effective solutions to ensure a quality installation that stands up to environmental stressors and maintains the integrity of the home’s structure. Regular maintenance, attention to detail, and adherence to industry best practices are key to troubleshooting and preventing issues during asphalt shingle installation.
Maintaining and Prolonging the Life of Your Asphalt Shingle Roof

When it comes to maintaining and prolonging the life of your asphalt shingle roof, consistent upkeep and timely interventions are key. Regular inspections should be conducted at least twice a year, ideally after extreme weather events. During these checks, look for damaged or loose shingles, signs of moss or algae growth, and ensure that the flashing around chimneys and vents is intact. Clearing gutters and downspouts of debris can prevent water damage that might compromise your roof’s structure.
To further protect your investment, consider applying a protective coating to your shingles. This can enhance their resistance to UV rays and environmental pollutants, which are common culprits in aging asphalt shingles prematurely. Additionally, ensuring proper attic ventilation is crucial for the longevity of your roof. It can significantly reduce the buildup of heat and moisture, both of which can lead to wear and tear on your shingles. Regularly replacing damaged shingles promptly and using quality materials for any repairs will also contribute to a longer lifespan for your roofing system. By adhering to these maintenance practices, you can safeguard your home against the elements and ensure that your asphalt shingle roof remains in top condition for years to come. Regular cleaning, careful inspection, and prompt repair are the pillars of prolonging the life of your asphalt shingle roof.
homeowners can confidently undertake asphalt shingle installation with the comprehensive insights provided in this guide. From comprehending the material composition and types of asphalt shingles, to preparing your roof and understanding the essential tools required for safe and effective installation, this article serves as a robust resource for anyone looking to enhance their home with durable, reliable roofing. By following the step-by-step instructions and addressing common issues, you’ll ensure a weather-tight seal that maintains its integrity over time. Regular maintenance, as outlined in the final section, will further protect your investment and extend the lifespan of your asphalt shingle roof. With this guide at hand, embarking on your DIY roofing project is within reach, guaranteeing a secure and visually appealing outcome for your home.